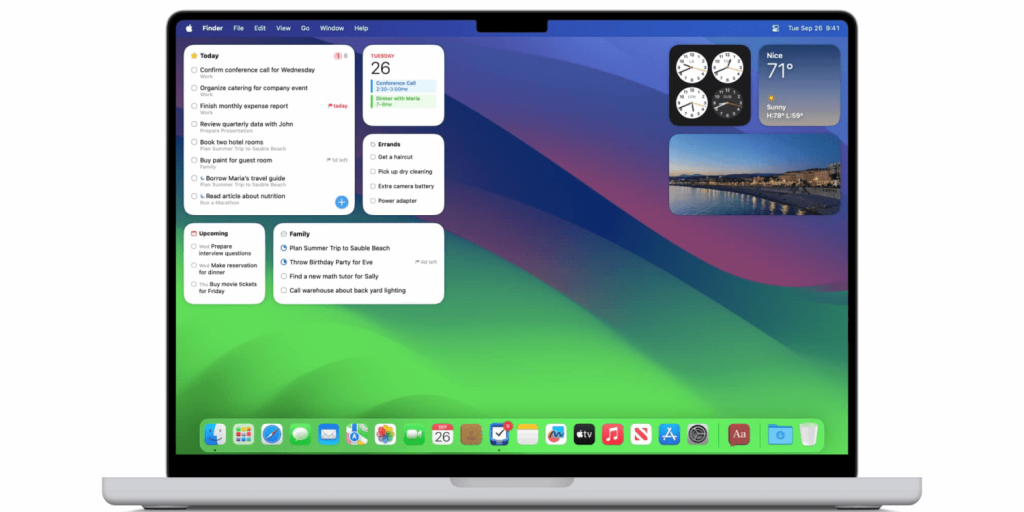
As with the Notifications, you can access widgets by clicking on the date/time in the top-right of the desktop. These are simple affairs at present but in time will become more intricate as Big Sur matures and more developers come on board to include widget styles in their apps.
The primary design of widgets is to provide quick and easy access to relevant information, images, reminders or some form of control. They’re handy elements to the OS but at present they can’t be pinned permanently to the desktop – although that may not even be possible in the future, if anyone reading this can recall the instant dislike to pinned widgets in Microsoft’s Windows Vista.
Arranging Your Widgets
Step 1 – Every aspect of controlling your widgets comes from the Edit Widgets button. You’ll find this at the bottom of the widgets area. Simply click on the date/time function, then move the mouse to the bottom of the widget area that’s slid-in from the left-hand side of the desktop. Click Edit Widgets when you see it.
Step 2 – The Edit Widgets display is split into three panels: the left-hand panel is made up of the available widgets, as well as a Search box to locate additional widgets as they’re developed. The middle panel shows a collection of the widgets and what they’ll look like, as well as your main interaction with adding new widgets. And the right-hand panel is where you’ll be able to rearrange any current widgets or remove them if necessary.
Step 3 – If you want to move a current widget, for example, click and hold the widget of choice and drag it over one of the other widgets. You’ll notice that widgets will shift their position based on where you want to place them, as well as being based on the size of the widget in question.
Step 4 – For example, two smaller widgets can be placed side-by-side, whereas the longer widgets will need more room. When you’re finished moving them around, you can click on the Done button at the bottom-right of the widgets display. This will return you to the desktop and display your widgets in their new positions.
Adding or Removing Widgets
The process for adding new widgets or removing some of the old ones is just as easy. Once again, click on the date/ time icon, followed by the Edit Widgets button when it appears at the bottom of your current widget groupings.
Step 1 – To add a new widget, either check out the available widgets on the left-hand panel or use the search function to locate any specific widgets. Alternatively, you can scroll through the widgets available in the middle panel.
Step 2 – When you have the widget you want, you have some sizing options to be aware of. Each widget can be sized as either Small, Medium or Large; using the S, M, L buttons under the widget. When you’ve found the size you want, click on the green plus icon in the top-left corner of the widget, which will add it to the list of widgets in the right-hand pane. And when you’re finished, click on the Done button to return to the desktop.
Step 3 – As you add more widgets they’ll begin to push the previous widgets up the screen. You can scroll through your widgets as normal, using either a scroll wheel on a mouse or by two-fingers sliding on the Touchpad. To remove any widgets and cut down on unnecessary clutter, simply click on the minus sign in the top-left of the widget that’s currently occupying your desktop; in other words, the group of widgets in the right-hand panel.
Step 4 – This will remove the selected widget and move the remaining widgets down the screen. When you’re ready, click on the Done button to return to the desktop and see how they’re stacked.
